How to Winterize an RV
Disclosure: This article contains affiliate links. If you buy through these links, we may earn a commission at no extra cost to you. We do not claim hands-on testing unless clearly stated.
A single hard freeze can split a water line, crack a pump housing, or crack a water heater tank — and by the time it shows, the RV has often been sitting for weeks unwatched. This guide covers whether winterizing applies to your situation, the order of operations for the water system, and how to choose between the antifreeze and compressed-air methods.
It skips exact antifreeze quantities, the full compressed-air procedure, and spring de-winterizing — each gets its own guide, linked below. It also skips the water heater's gas or electric heating elements: this is the plumbing side only, and heating-element service follows your manufacturer's manual, not this page.
Quick Answer: What You'll Need
Two methods protect an RV's water system from freezing: pouring in RV-safe antifreeze, or blowing the lines clear with compressed air. Both need one thing first — bypassing the water heater.
Antifreeze (pour-in) method:
- RV/marine-safe (non-toxic) antifreeze
- Water heater bypass kit
- Funnel or pump connector to draw antifreeze through the system
Compressed-air (blow-out) method:
- Air compressor, sized appropriately for this job
- Blow-out plug or compressor adapter
- Water heater bypass kit — same requirement as above; this step doesn't change based on method
Do You Need to Winterize?
Water expands roughly 9% when it freezes. That expansion — not the cold itself — is what splits lines, fittings, and pump housings still full of water when the temperature drops.
Winterize if: the RV will sit anywhere temperatures reach freezing or below, even briefly, without active heat.
Skip or go partial if: it's stored in a heated, enclosed space that never approaches freezing, or in continuous winter use with the furnace running and monitored.
Not sure which camp you're in? Treat an unheated storage unit, driveway, or outdoor lot as "winterize" — a few hours below freezing on one night is enough to do damage, and nobody's checking at 3 a.m.
Before You Start — Check These First
A few checks before you touch a valve save a second trip to the parts store.
- Water heater tank size. Six-gallon and 10-gallon tanks are both common and take different bypass kits — check your model first.
- Whether a bypass kit is already installed. Some newer rigs ship with one built in.
- Number and location of low-point drains. Varies by floor plan — check your owner's manual, don't assume it matches a friend's rig.
- A separate ice maker, washing machine, or outdoor shower. Those need their own attention — see winterizing a washing machine and ice maker in an RV if you have either.
Step-by-Step: Winterizing the Water System
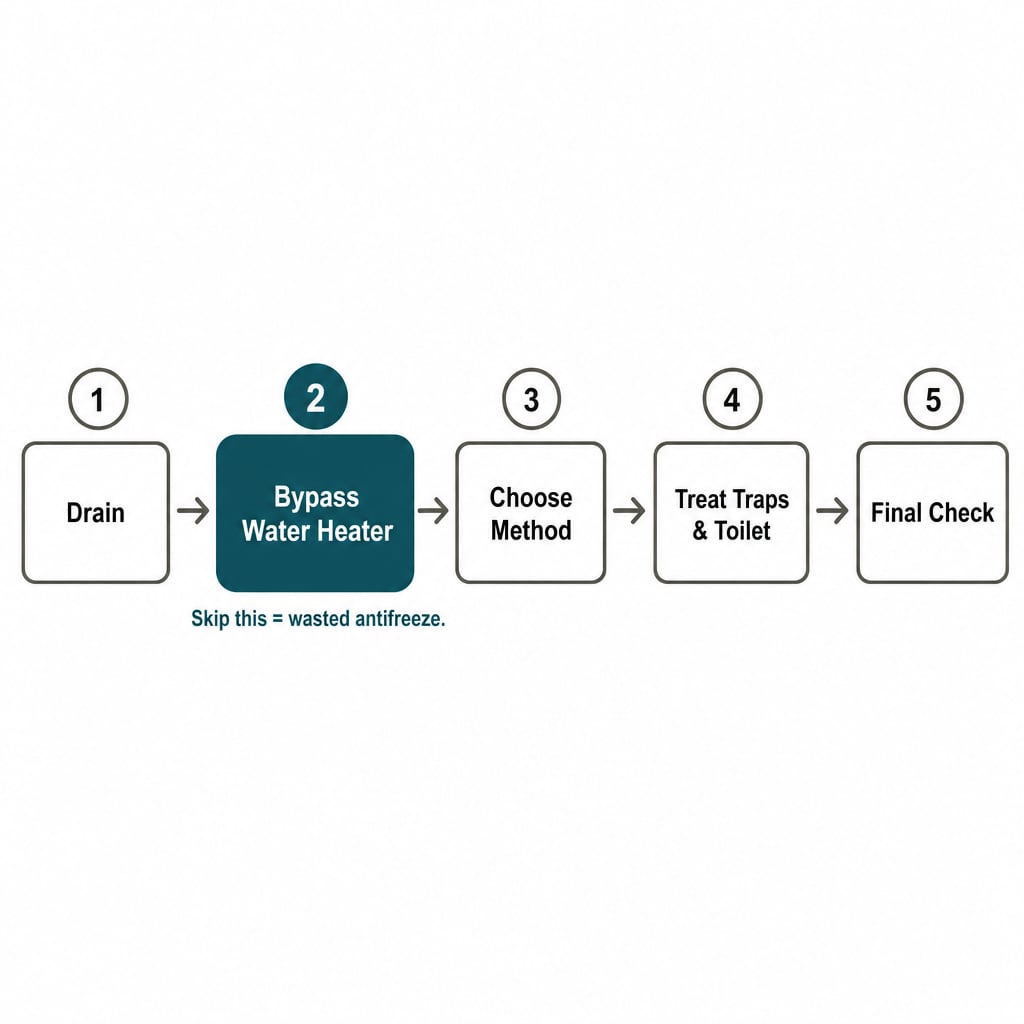
Do the steps in this order. Skipping ahead — especially skipping the bypass — is where most of the mistakes below come from.
Step 1 — Drain the Fresh Water Tank and Water Lines
Open the low-point drains and the fresh tank drain, then open every faucet — hot and cold — to break the vacuum and let gravity finish the job. Don't skip a faucet; each clears a different branch of the line.
Step 2 — Bypass the Water Heater
This is the step most generic overviews skip or bury, and it matters most. Without a bypass switched to the bypass position, antifreeze poured in anywhere else fills the entire water heater tank instead of just the lines — 6 to 10 gallons wasted on a tank that didn't need protecting.
Check your own tank's rated gallons before ordering a kit — see our bypass kit options for both 6-gallon and 10-gallon sizes.
Step 3 — Choose Your Method
Antifreeze and compressed air both protect the lines; they just get there differently. See "Do You Need to Winterize?" above if you haven't decided — the short version: antifreeze fills and protects, compressed air empties and clears.
Step 4a — Antifreeze Method
With the bypass in place, pour RV/marine-safe antifreeze into the lines through the pump's winterizing hose or directly into the fresh tank, then run each faucet — hot and cold — until color shows steadily, not just a trace.
Use RV or marine-safe antifreeze only. Automotive antifreeze is ethylene glycol — toxic, not rated for a potable system. RV/marine antifreeze is propylene glycol specifically because it's safe in a system you drink from. For exact quantities by rig size, see how much antifreeze your rig actually needs.
Step 4b — Compressed-Air Method
Attach a blow-out plug to the city water inlet, connect a compressor at low PSI, then open each faucet in turn until only air comes through. Compressor sizing and the full procedure are in our compressed-air walkthrough — kept brief here on purpose.
Air alone doesn't finish the job: traps and the toilet still need a little antifreeze regardless of method (see Step 5).
Step 5 — Don't Forget the Traps and Toilet
P-traps, the toilet bowl, and any low-use fixture — an outdoor shower, a washer standpipe — need a little antifreeze poured in directly, no matter which method protected the rest of the system. Compressed air blows lines clear; it doesn't protect a trap that just sits there all winter.
Step 6 — Protect the Pump
The pump housing can crack the same as any other line. Antifreeze passing through the pump in Step 4a protects it. Compressed-air users should confirm the pump itself is fully drained — blown clear isn't the same as drained, and standing water left inside the housing can still freeze.
Step 7 — Final Checks
Faucets closed, bypass valve confirmed in the bypass position (not still routing to the tank), water heater's power switch off for the season. A bypass valve bumped back to normal during the work undoes everything Step 2 accomplished.
Tools and Products That Help
None of the three below compete with each other — winterizing takes one of each type, not a choice between them.
-
Non-toxic antifreeze — Camco Arctic Ban RV & Marine Antifreeze, model 30807. Manufacturer-listed freeze protection to −50°F when used undiluted; actual protection is lower if the antifreeze has been diluted or is past its useful shelf life. Camco sells several antifreeze lines (Arctic Ban, Full Timer's Choice, Easy Going) — this is specifically the 30807/Arctic Ban product.
-
Water heater bypass kit — Valterra P23503LFVP, dual-valve, sized for 6-gallon tanks. Check your own tank's rated gallons first — a 10-gallon tank needs a different kit; see 10-gallon and single-valve options.
-
Blow-out plug — Winterize Mfg. Heavy-Duty Quick Connect, machined from a single piece of aircraft-grade aluminum, not brass. No PSI rating or dimensions are published, so none are given here.
Pump itself needs replacing, not winterizing? See our guide to choosing a replacement pump.
Common Mistakes
Mistake 1: Skipping the Water Heater Bypass
What it looks like: Antifreeze goes straight into the lines or fresh tank, bypass skipped.
Why it's a problem: Antifreeze fills the entire tank — 6 to 10 gallons wasted on a component that didn't need protecting.
What to do instead: Confirm the bypass valve is installed and turned to bypass before any antifreeze goes in.
Mistake 2: Using Automotive Antifreeze Instead of RV-Safe Antifreeze
What it looks like: Grabbing whatever antifreeze is already in the garage.
Why it's a problem: Automotive antifreeze is ethylene glycol — toxic, not rated for a system people drink from.
What to do instead: Use RV or marine-safe antifreeze (propylene glycol) only.
Mistake 3: Treating Compressed Air as a Complete Substitute for Antifreeze
What it looks like: Blowing the lines clear and calling the system fully winterized.
Why it's a problem: Traps, the toilet bowl, and low-use fixtures still hold standing water that air alone won't protect.
What to do instead: Add a small amount of antifreeze to traps and the toilet regardless of method.
Mistake 4: Assuming the Bypass Kit Is One-Size
What it looks like: Ordering a bypass kit by RV make or model instead of checking the water heater itself.
Why it's a problem: Six-gallon and 10-gallon tanks both exist across the fleet, sometimes within the same brand's lineup, and take different kits.
What to do instead: Check your water heater's rated gallons before ordering — see "Before You Start" above.
FAQ
Do I need to winterize if I store my RV in a heated garage?
No, if the space reliably stays above freezing all season. A garage with one uninsulated corner, though, can still let the lines along that wall freeze.
Can I use automotive antifreeze instead of RV antifreeze?
No. Automotive (ethylene glycol) antifreeze is toxic and isn't rated for a potable water system. RV/marine antifreeze is propylene glycol, specifically because it's non-toxic.
What's the actual difference between the antifreeze and compressed-air methods?
Antifreeze fills and protects the lines with fluid; compressed air empties them instead. See our compressed-air method in detail.
Do I still need to bypass the water heater with compressed air?
Yes. The bypass isn't method-specific — it protects the tank either way.
How much antifreeze do I actually need?
Depends on rig size and line length; this page doesn't guess at a number. See how much antifreeze your rig actually needs.
What if my RV already has a built-in bypass valve?
Common on newer rigs — check before buying a kit. If it's there, Step 2 is just turning the valve.
Sources Reviewed
For this guide, we reviewed retailer listings for the Camco Arctic Ban antifreeze (Ferguson, Life and Home, and RV Upgrade Store all cite the same −50°F figure) and for the Valterra bypass kit (etrailer.com), since Valterra's own manufacturer page blocked direct access. For the Winterize Mfg. blow-out plug, two independent retailer listings stood in after the manufacturer's site failed to resolve; where a source didn't publish a figure — PSI rating and dimensions — we said so rather than estimating one.
Related Guides
- How to Winterize an RV With an Air Compressor
- How Much Antifreeze to Winterize an RV
- How to De-Winterize an RV
- How to Winterize a Washing Machine in an RV
- RV Water Heater Bypass Valve
- RV Water Pump Buying Guide
- RV Water Pump Not Working