How to Replace an RV Refrigerator: What the Job Actually Involves
Published
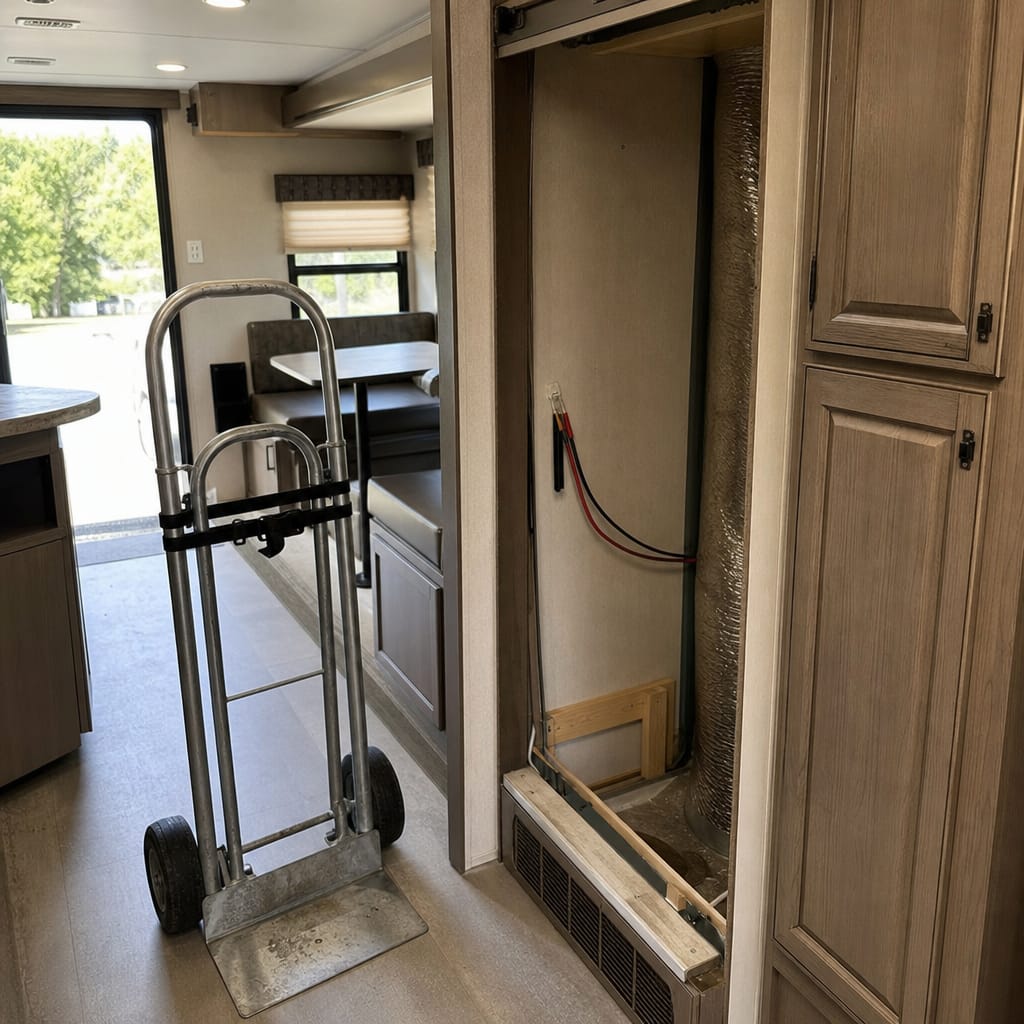
Your absorption fridge is dead, unreliable, or just the wrong size for the galley you're redoing — and it's not obvious yet whether swapping it is a weekend DIY job or a trip to the shop.
This article covers deciding whether to DIY the swap, what to measure before you order anything, the removal-to-install sequence, resealing the roof vent, reconnecting the gas line, and the one point in that sequence where a professional has to sign off.
It does not cover which refrigerator brand or model to buy (see Related Guides), cutting or modifying cabinetry, gas line or regulator service procedures, or 120V AC wiring work at the unit's power connection.
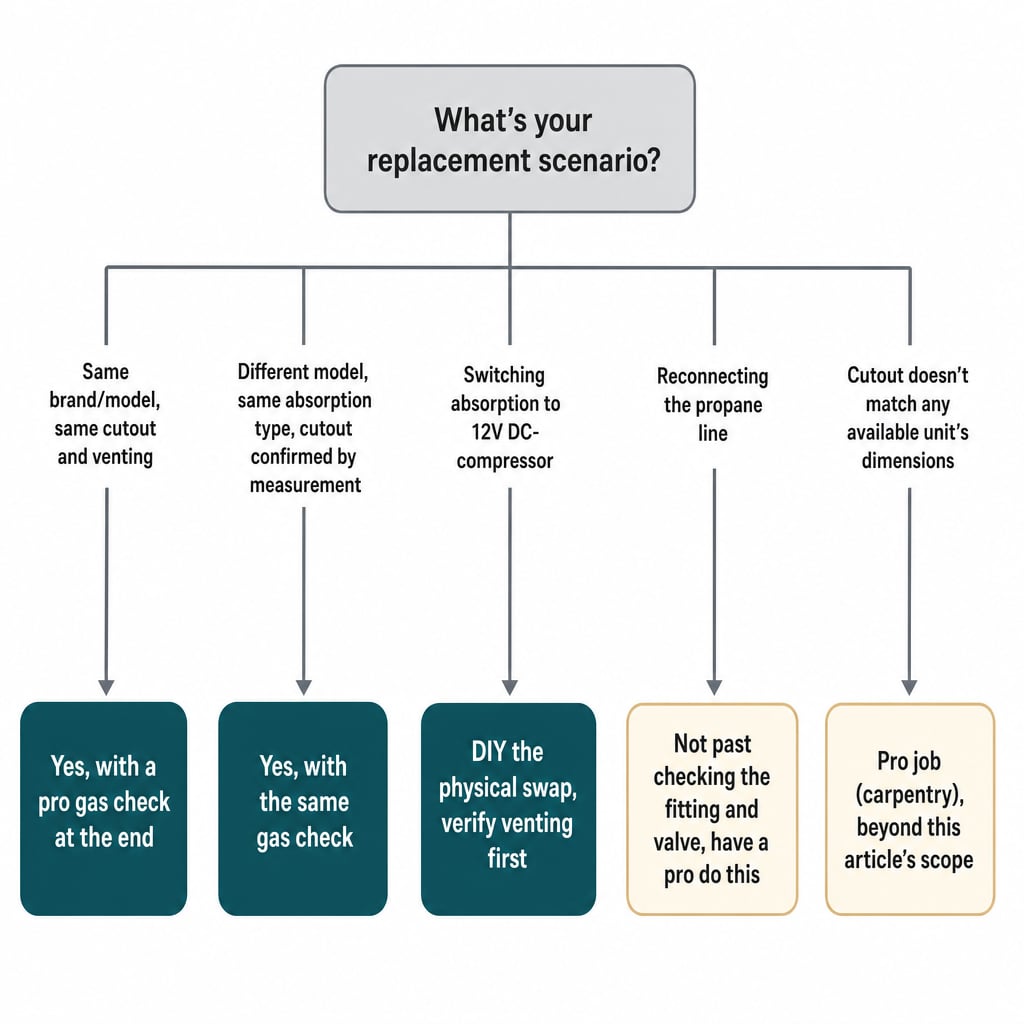
Quick Answer: Is This a DIY Job?
Most of a refrigerator swap is DIY-feasible — except confirming the gas line reconnection, which always gets a professional's sign-off. Not sure the fridge is actually beyond repair? Diagnose the problem first.
| Scenario | DIY feasible? | Why |
|---|---|---|
| Same brand/model, same cutout and venting | Yes, with a pro gas check at the end | No structural or venting changes |
| Different model, same absorption type, cutout confirmed by measurement | Yes, with the same gas check | Venting type unchanged |
| Switching absorption ↔ 12V DC-compressor | DIY the swap; verify venting first | Venting needs — and whether a gas line applies at all — may differ |
| Reconnecting the propane line | Not past "fitting seated, valve open" | Have a Pro Do This — see below |
| Cutout doesn't match any available unit | Pro job (carpentry) | Beyond this article's scope |
What you'll need: a way to move a heavy appliance through a narrow hallway, butyl seal tape for the roof vent, and a leak-check solution for the fitting — see Tools That Help below.
Before You Order: Measure First
Measure the existing cutout — width, height, depth — plus the door-swing clearance in the surrounding cabinetry. Confirm the venting type your new unit needs: absorption units vent through the roof and often a side vent too. Switching to a 12V DC-compressor unit? Check that model's venting requirement against what your RV already has. Also confirm the power-input combination the new unit needs — some mix of 120V AC, 12V DC, and LP gas.
Dimensions vary more than brand name suggests. Norcold's own N4150 lists at 49-3/16" H × 20-3/4" W and 85 lbs; its N8XF lists at 59-7/8" H × 23-1/2" W and a net weight of 142 — the source's own spec table doesn't print a unit for that number — same brand, same absorption category, a visibly different footprint and weight. Check the specific model's listed dimensions against your own cutout; same brand isn't same size.
A complete listing states exact H×W×D, the venting type required, and the full power-input combination. Missing one of those? Call the manufacturer before you order. For help picking a unit, see our full RV refrigerator buying guide.
Replacing the Refrigerator, Step by Step
Step 1 — Decide same-type or different-type replacement
Decide this before ordering, not after the old unit is out. Same brand and model is mostly a direct fit. A different model, or switching absorption to 12V DC-compressor, means revisiting Before You Order above. Our Norcold and Dometic guides cover the model-specific differences.
Step 2 — Shut off and disconnect
Shut off 120V AC, 12V DC, and LP gas before disturbing the old unit. This article doesn't cover the wiring or valve-service steps — if you're not confident, have a pro confirm the gas supply is shut off first.
Step 3 — Remove the old unit
Once disconnected, the old absorption fridge still has to go out through a door and hallway not built for appliance removal. A two-wheel appliance hand truck like the Harper Trucks 6781 earns its place here — moving it without gouging the floor or doorframe is the real difficulty. See Tools That Help below.
Step 4 — Bring the new unit in and position it
Bringing the new unit in is the same problem in reverse, with the same hand truck doing the work. Confirm your hallway and doorway width clears its footprint — a tight RV hallway isn't residential clearance.
Step 5 — Reseal the roof vent opening
Only if the vent cap, frame, or old seal was disturbed during removal — not every swap needs this. If yours does, Dicor's BT-1834-1 butyl seal tape is one option: manufacturer-listed application temperature 30–110°F, service range −20–275°F once applied, and don't stretch it — stretched tape thins and loses its seal. Tape alone only works if the existing screw holes and vent frame are sound enough to reuse.
Step 6 — Reconnect the gas line and test the fitting
If your replacement unit has no gas line to reconnect — some 12V DC-compressor models run on DC power only — skip ahead to Step 7. Only general terms apply here: confirm the fitting is seated and the valve open. No torque specs, regulator settings, or line-pressure procedures — not a DIY step.
What you can do yourself is a bubble test: brush or spray a leak-detection solution like Real Cool Snoop onto the fitting — sustained bubbling means a leak. That's a self-check before calling a professional, not a substitute for one. Any sign of a leak, stop and have a pro confirm the connection before using the fridge. See how RV refrigerators use propane for more.
Step 7 — Power up, set the mode, and confirm cooling
Once reconnected and the pro gas check is done, power up the unit, set its mode, and give it time — absorption units are slow to pull down from room temperature. Not cooling after a reasonable wait? See how to diagnose a cooling problem.
Tools That Help With the Job
Disclosure: This article contains affiliate links. If you buy through these links, we may earn a commission at no extra cost to you. We do not claim hands-on testing unless clearly stated.
Dicor BT-1834-1 Butyl Seal Tape — for resealing the roof vent if the cap, frame, or old seal was disturbed. Tape-only, no screws, so it only works if the existing screw holes and vent frame are sound and reused. Apply per the manufacturer's instructions, and don't stretch it.
Harper Trucks 6781 Appliance Hand Truck — for moving the old unit out and the new one in through a narrow RV hallway. The manufacturer lists an 800 lb capacity; real-world capacity depends on how the load is secured and the surface it's rolled over, not just the number. Confirm your hallway width before assuming it clears, and note the non-marking wheel facing for RV flooring.
Swagelok Real Cool Snoop Liquid Leak Detector, 8 oz. — for the bubble test on the reconnected fitting in Step 6. Sustained bubbles mean a leak; no bubbles isn't a professional sign-off, just a self-check before one.
None of these three touch refrigerator selection itself — for that, see our Norcold or Dometic buying guides.
Have a Pro Do This
Three things here are outside DIY territory:
- The gas line connection itself, beyond confirming the fitting is seated and the valve open — no regulator, line-pressure, or torque instructions in a DIY swap.
- Any sign of a leak found during the bubble test. Stop and call a professional — this isn't a tighten-and-retest situation.
- 120V AC wiring at the unit's power connection, if the new unit's connection method differs from the old one's.
If your job lands in one of these three, this article's job is confirming that's where you are, not walking you through what's next. Routine maintenance that prevents an early replacement is worth a look too.
Where This One Stops
This article doesn't cover which refrigerator brand or model to buy — see Related Guides for the cluster's buying guides. It also doesn't cover cutting or modifying cabinetry, gas line or regulator service procedures, or AC wiring instructions. Past the steps above, the manufacturer's installation documentation and a licensed RV technician are next for anything this article doesn't walk through.
Common Mistakes
Mistake 1: Ordering before measuring the cutout
What it looks like: Ordering a "same category" replacement without measuring the cutout or checking the new model's listed dimensions.
Why it's a problem: The Norcold N4150-vs-N8XF comparison above shows dimensions vary even within one brand's line.
What to do instead: Measure your cutout and door-swing clearance, then check the model's listed H×W×D against it.
Mistake 2: Switching types without confirming venting
What it looks like: Swapping absorption for 12V DC-compressor, or the reverse, without checking the venting requirement.
Why it's a problem: Venting needs can differ between the two types.
What to do instead: Check the new unit's venting requirement against what your RV already has before you order.
Mistake 3: Treating the bubble test as the final word
What it looks like: No bubbles during the Snoop test, so the connection's considered done.
Why it's a problem: A bubble test is a self-check, not a professional leak or pressure check.
What to do instead: Have a pro confirm the connection regardless of how the bubble test goes.
RV refrigerator specs at a glance
Norcold and Dometic absorption refrigerators run on some combination of 120V AC, 12V DC, and LP gas, and each brand — often each individual model's own listing — publishes its power-draw and capacity figures in its own format, scattered across product pages and parts listings rather than gathered in one place. This table puts the capacity, LP gas input, AC and DC amp draw, dimensions, and weight for a starting set of Norcold and Dometic absorption models side by side, sourced from each listing's own published specifications, so a reader checking their unit's actual draw against a nameplate figure has a real number to check it against instead of a guess.
| Refrigerator / model | Type | Capacity | LP gas input (BTU/h) | AC input | DC input | Dimensions (as published) | Net weight | Source | Source checked |
|---|---|---|---|---|---|---|---|---|---|
| Norcold N4150 | 3-way absorption (120V AC / 12V DC / LP gas) | 5.3 cu. ft. | 2.5 A (120V AC) | 17.6 A (12V DC) | 49-3/16" H x 20-3/4" W x 22-11/16" to 22-25/32" D | 85 lbs. | RV Fridge Guys product page for the Norcold N4150 (retailer listing republishing Norcold's own unit specifications) | 2026-09-26 | |
| Norcold N8XF (N8LXF) | 2-way absorption (120V AC / LP gas) | 8 cu. ft. | 3 A (120V AC) | 1.2 A (12V DC) | 59-7/8" H x 23-1/2" W x 24" D | 142 (unit not labeled on source) | RV Fridge Guys product page for the Norcold N8XF / N8LXF (retailer listing republishing Norcold's own unit specifications) | 2026-10-11 | |
| Dometic RML8330 | 3-way absorption (12V DC / 120V AC / LP gas, per source) | 4.8 cu. ft. | 50.94" x 16.56" x 23.56" (axis order not labeled on source) | United RV Parts product page for the Dometic RML8330 (retailer listing republishing Dometic's own unit specifications) | 2026-09-26 | ||||
| Dometic Americana II DM2872RB1 | 2-way absorption (120V AC / LP gas) | 7.31 cu. ft. total; published alongside separate component figures of 5.6 cu. ft. fresh food and 1.7 cu. ft. freezer (see caveats — these do not sum to exactly 7.31); sold as an "8 cu. ft." model | 1,500 BTU/h | 2.7 A / 440 W (120V AC) | 24-7/8" W x 26" D x 60-13/16" H | 124 lbs. | Camping World product page for the Dometic Americana II DM2872RB1 (retailer listing republishing Dometic's own unit specifications) | 2026-09-26 |
How these numbers were produced: Every figure is quoted or closely paraphrased from the source page's own stated specifications for that exact model, with the source line kept in each row. Where a manufacturer's own product page did not expose a structured specification table to this tool, the figure is sourced instead from a parts or retail listing that republishes the manufacturer's stated specifications for that model; each row's source label says which. AC and DC amp-draw figures are reported exactly as published for the voltage stated on the source page and are not converted, combined, or re-derived. LP gas input (BTU/h) is left blank wherever the checked source did not publish a figure for that specific model, which is common: several listings state AC and DC draw in detail but omit a BTU rating entirely.
- A blank cell means the checked source for that model does not publish that figure, not that the value doesn't exist anywhere. LP gas input (BTU/h) is blank for the Norcold N4150 and N8XF and for the Dometic RML8330 for this reason — each source publishes AC and/or DC amp draw but not a BTU rating for that specific model.
- This is a starting set, not full coverage of either product line: two Norcold absorption models and two Dometic absorption models, chosen to represent common 2-way and 3-way configurations in the capacity range these units typically come in. Norcold and Dometic each sell more absorption models, plus separate 12V DC-compressor lines (Norcold's Polar/N2000-series, Dometic's NRX/NRXD-series) that are out of scope for this version.
- Dometic's Americana II DM2872RB1 is sold and commonly listed as an "8 cu. ft." model; its own spec listing states 7.31 cu. ft. of total storage volume, plus separate component figures of 5.6 cu. ft. fresh food and 1.7 cu. ft. freezer. All three figures are reported as published rather than reconciled: the two components add to 7.3 cu. ft., 0.01 short of the stated 7.31 cu. ft. total, most likely from rounding on the source's own page.
- The Dometic RML8330's source lists a single "Load Amps: 2-4 Amps" figure without stating which voltage it applies to. Rather than assign an unlabeled figure to either the AC or DC column, it is left out of both and noted on the row instead.
- The Norcold N8XF/N8LXF source page states its net weight only as an unlabeled number ("142.0000"), and no other weight figure appears on that page to check the unit against. Rather than assert a unit the source does not state, the table shows this cell as "142 (unit not labeled on source)".
- The Norcold N4150 source page's metric (cm) conversion for depth does not agree with its own inch figure for the same dimension. The inch figure is reported here; the metric conversion is not, since the two didn't agree and no manufacturer figure was available to re-derive the correct conversion from.
- All figures are manufacturer-listed nameplate and spec-page numbers, not a guarantee of real-world performance or of what a specific installed unit will draw. Actual draw and cooling performance depend on ambient temperature, ventilation, correct leveling, LP supply pressure, and battery/charging system condition. A unit reading well outside its own published figures is worth investigating against that model's own number — not against a different model's number on this table.
These are the entries that matter for this guide. The full table, with every row and its source, is in our complete guide.
FAQ
How do you remove an RV refrigerator?
Shut off AC, DC, and LP gas, disconnect the unit, then move it out — see Steps 2 and 3 above.
How do you install a new RV refrigerator?
Position the new unit, reseal the vent if needed, reconnect the gas line, have a pro confirm it, then power up — Steps 4 through 7 above.
How much does it cost to replace an RV refrigerator?
Brand, capacity, absorption-vs-compressor type, and DIY vs. paid labor all factor in — too wide a range to quote without your specific model and shop.
Can I replace an RV refrigerator myself, or do I need a pro?
Most of the swap is DIY-feasible except the gas line reconnection, which always gets a professional's sign-off.
Do I need different venting if I switch from an absorption fridge to a 12V compressor fridge?
Check the new unit's specific venting requirement against what your RV already has before ordering — don't assume either direction is a direct swap.
Is it safe to reconnect the propane line myself after installing the new fridge?
Confirm the fitting is seated and run a bubble test if you want, but have a professional confirm the connection either way. This is the one hard line in this job.
Related Guides
- RV refrigerator buying guide
- Diagnose before you decide to replace
- Norcold buying guide
- Dometic buying guide
- How RV refrigerators use propane